Imitating the Canvas Engine (9): Transforming the Shadow Map to Screen Space
Previous Post:
Imitating the Canvas Engine (8): Constructing the Shadow Map - Memories of Melon Pan
The way most shadow maps work, they do a simple calculation to find a pixel in screen space. If it's in shadow, darken the pixel.
But the Canvas engine doesn't work like that exactly. Instead, there are those pencil lines that darken the scene anywhere there's shadow. If you watch real closely, though, you'll see that there are some areas shaded with these pencil lines more than others. And finally, if you open up Book Mode and start viewing character models, you'll see that the shadows bleed out of the model and onto the background slightly. We're going to be doing all of this.
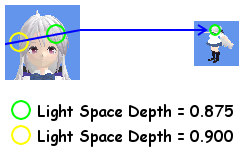
The first problem though, is to go through each pixel in screen space and see where it would be in light space and what depth it would have had if rendered there. Once we have that, we compare that to the actual depth in light space for that pixel. If the screen space pixel's light depth is greater than the actual light space depth, then the pixel is in shadow, since there is something between it and the light.
... Yeah, that's a mouthful, right? Behold ye picture instead.
The second problem is the partial shading, and the way I'm doing it is like toon shading. In the first preprocessing pass, I also did some toon shading, but I didn't darken pixels too much there. The reason is that the bulk of the diffuse color shading would be done in this step instead, with light pencil lines.
Since each pixel in shadow affects whether other pixels are drawn in shadow (because of that shadow bleeding), we're going to have to store this in a temporary texture so we can do the bleed effect. This effectively means rendering the scene a second time into what I'm calling the scene shadow map, or the shadow map from the perspective of the regular scene camera.
The vertex shader is pretty simple, as long as we keep in mind what our ultimate goal is. For hard shadows, the pixel shader needs to know the vertex's position in world space. For partial shadows, it needs the vertex normals. Our vertex shader only needs to pass those two to the pixel shader, as well as calculate the screen position of the vertex like normal.
output.WorldPosition = mul(input.Position, World);
output.Position = mul(input.Position, WorldViewProj);
output.Normal = input.Normal;
For the variables:
- World, the vertex's world transformation matrix
- WorldViewProj, the scene's combined world matrix, view matrix, and projection matrix
Where output.Position is the position of the vertex in screen space,
You can pass in World and WorldViewProj to the effect itself as parameters. The output of our vertex shader will be the input of our pixel shader, which will render the scene shadow map.
The value of each pixel in our scene shadow map will be:
- 1.0, if the pixel is in hard shadow
- Lambertian shadow amount (the inverse of Lambertian light amount), otherwise
The last one is pretty easy to figure out, so let's look at the first one. This is where we have to figure out if a pixel can be seen from the point of view of the light or not.
The first thing is we can find the position of the pixel from the point of view of the light. The vertex shader passes the pixel shader the position in world space, and we already have the shadow view-projection matrix from the last step. The calculation turns out to be pretty easy.
float4 LightPosition = mul(input.WorldPosition, ShadowViewProjection);
float LightDepth = (LightPosition.z / LightPosition.w) - 0.01;
The last subtraction is a small fudge since floating point numbers are only so precise. Without it, there's a bunch of annoying aliasing that happens since floats are approximated.
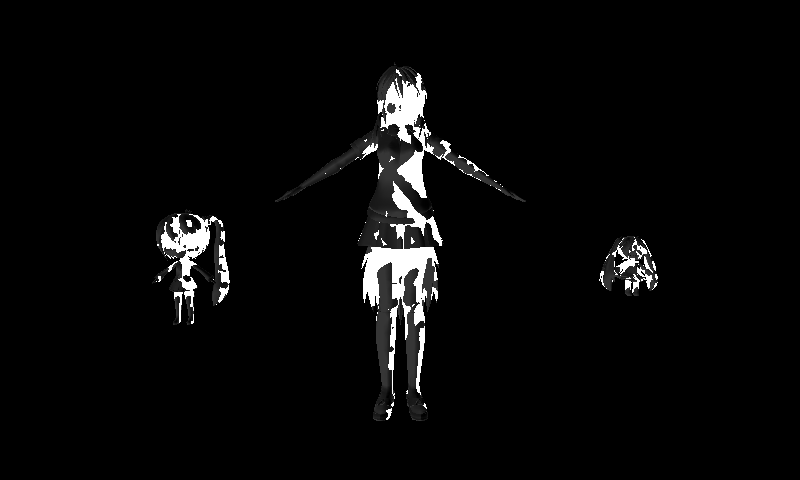
Pretty annoying, huh? This is actually the screen shadow map after the next effect (Lambertian shadow amount) is added, but I think anyone can see this is a jumbled mess of fail.
We can fudge with a small subtraction to bump ourselves back into win, but it does have the side effect of eliminating shadows where there should be some. If you subtract 0.01 as a fudge, then shadows are only drawn if they're more than 0.01 (or thereabouts) away from the pixel that actually blocks it from the light. However, if you don't want too many shadows in your scene, this can be a good thing.
When you're done with those calculations, you end up with the projection space position of the pixel in the shadow map. There's just one caveat - the shadow map has already been written to a texture, so it's actually in screen space. This can do some funky things with our numbers.
- The x and y axes in projection space are in the range [-1.0, 1.0].
- The x and y axes when reading from a texture are in the range [0.0, 1.0].
- The y axis in projection space increases as you go higher in space, maxing out at 1.0 at the top of the screen.
- The y axis when reading from a texture increases as you go down the texture, starting at 0.0 from the top of the screen.
This means we have to convert the projection space range [-1.0, 1.0] to the texture space range [0.0, 1.0], then flip the y axis.
float2 ShadowMapTexCoord = ((LightPosition.xy / LightPosition.w) + 1.0) / 2.0;
ShadowMapTexCoord.y = 1.0 - ShadowTexCoord.y;
With all that, we can just read the shadow map like a texture and take the depth from any output channel that contained it. Just remember to set the shadow map as an effect parameter before you do all this.
float ShadowDepth = tex2D(ShadowMapSampler, ShadowMapTexCoord).r;
So now we have our two depth values. The first, LightDepth, is the depth of the scene pixel if it were rendered from the light's point of view. The second, ShadowDepth, is the actual depth that the shadow map contains, and is the depth of the closest object to the light (from that light space pixel).
If LightDepth is greater than ShadowDepth, that means that there is something closer to the light than the object in this scene pixel, so the pixel must be in shadow. If this is the case, we set our output color to 1.0.
If not, then we pretty much apply Lambertian shading. However, we're not looking for the amount of diffuse light, but the opposite - the amount of diffuse shadow. We still calculate it similarly, and since we output it, we have to convert it to from the dot product range of [-1.0, 1.0] to HLSL's color output range of [0.0, 1.0].
S = (-dot(vn, -vl) + 1.0) / 2.0
For the variables:
- S, shadow amount
- vn, the normal vector
- vl, the direction of the light
The only difference is we negate the dot product for diffuse shadow. If S = 0.0, then the pixel is coincident with the light - in other words, it directly faces it. If S = 0.5, then the normal is perpendicular to it, and if S = 1.0, then at this point the normal is facing directly away from the light.
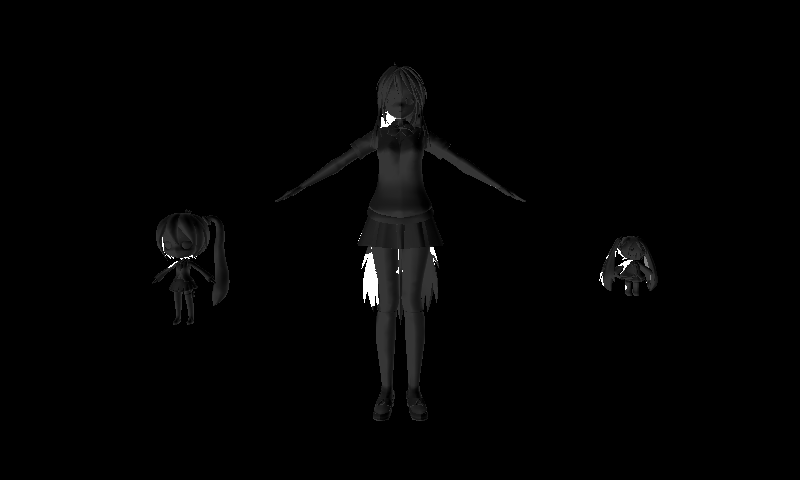
And this is our scene shadow map! We're finally done with making the shadow map that matters. The only things we have left to do is to apply the shadow bleed effect to the scene shadow map, then apply shadows to the scene based on it.
Next Post:
Imitating the Canvas Engine (10): Light Direction Transformations - Memories of Melon Pan


