Imitating the Canvas Engine (2): Normal Maps and Depth Blur
Previous Post:
Imitating the Canvas Engine (1): Basic Shading Effects - Memories of Melon Pan
My depth blurring algorithm is exceedingly simple, like a lot of the parts of my imitation canvas renderer. Some people might be more familiar with the term depth of field, but I'm calling it depth blurring because well... in reality, what I'm doing is a poor man's way of doing depth of field. This isn't too big of a component of the renderer, and originally, I thought I'd skip it entirely. But then I thought of a really simple way of blurring objects in the distance, and figured I'd just throw it in.
Depth blurring can be handled as a postprocess effect, meaning there's stuff to be done after the entire scene is transformed from positions and stuff in 3D space onto your 2D monitor. Or rather, we can take what would go onto your 2D monitor, store it some place in memory, and do stuff to it before letting it go to the monitor. Obviously, we're working with depth and not color (which is what a regular rendered scene consists of), but we have structural information about the scene, so we can use that instead.
Only thing is, we're doing edge detection later, and the edge detection algorithm also uses the scene's depth information, along with vertex normals. That's four different variables per pixel we want to store, which works out because that's all the channels we can output. We calculate all that at once for each pixel, then output it to a texture so we can use it later.
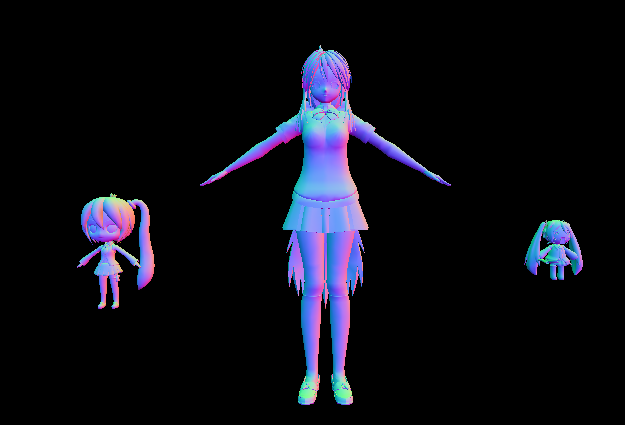
If we wanted to take a look at our scene in terms of vertex normals and depth values (from the camera), it would look like this.
It's a basic transformation.
Normal.x → Output.r
Normal.y → Output.g
Normal.z → Output.b
Position.z / Position.w → Output.a
Output.rgb = (Output.rgb + 1.0) / 2.0
So the more green you see, the more the vertex normal points up. This texture isn't rendered with transparency enabled, but if it were, transparent pixels would be closer to the screen, while solid pixels would be further.
That last bit there is because normals can point in negative directions having the range [-1.0, 1.0]. Since we're technically outputting color, we have to end up values between [0.0, 1.0] for each channel. The same thing happens when you divide depth (Position.z) by the position's w component. Just watch out if your near plane is like, 1.0 while your far plane is something huge like 10000.0. The way the numbers work out, Position.z / Position.w will always be some number very close to 1.0, making it hard to differentiate between what's closer and what's farther.
Of course, you'll want to clear the texture to solid black, (0.0, 0.0, 0.0, 1.0), before you create the normal depth map. The pixel shader will only run on screen pixels where there's something to shade, so any pixel that doesn't have an object to render will have a zero vector for its normal and the maximum depth value 1.0. If you're using a skybox, you'll probably want to leave that out when you make the normal depth map, or you'll get normals and depths where there's technically background.
We can take all this and run it through our shader, then save the output to a 2D texture. Really, the purpose of this texture is just to take all the normals and depths at every pixel in the scene and store them somewhere so we can look them up later.
... Like when we do depth blurring on the cheap. Not completely cheap though. It's pretty obvious that you can define some depth threshold T, and have scene pixels with a depth past that threshold be blurred.
But that could be a pretty abrupt transition - you move the camera, and all of a sudden things blur. What you can do instead is define two thresholds, Tn and Tf (near and far thresholds). If it meets or exceeds Tf, then apply a full-powered blur on the pixel. If the pixel's depth is between the two thresholds, we partially blur the pixel. You can calculate the color of the scene pixel as if it were fully blurred, then interpolate between that and the actual scene color if necessary.
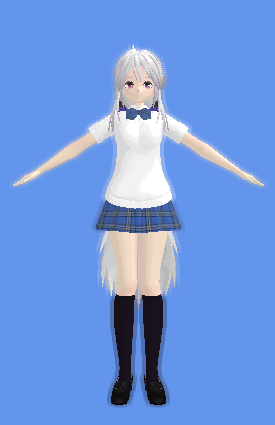
The only thing to remember is that we don't want the background to blur itself, or we'll get something like this.
Since the background depth is 1.0, the pixels around every model will be blurred, and we'll get some pretty bad ghosting. If we don't want this, remember that background pixels will have a zero vector for their normal since we cleared the background to black earlier. We can check for this, and not do any blurring if we're on a background pixel. This is also why we don't want to include skyboxes when making the normal depth map.
C = Cs, if d < Tn or (n.x == 0.0 && n.y == 0.0 && n.z == 0.0)
lerp(Cs, Cb, (d - Tn) / (Tf - Tn)), if Tn <= d < Tf
Cb, if d >= Tf
For the variables:
- C, final output color
- Cs, original scene color, the color of the pixel when the scene is rendered normally
- d, depth at the current pixel, obtained from the normal depth map
- n, normal at the current pixel, obtained from the normal depth map
- Cb, blur color, the scene color Cs with full blur applied
- Tn, near depth threshold
- Tf, far depth threshold
Where lerp(x, y, s) = x + s * (y - x), the linear interpolation between two colors x and y, given a scaling factor s in the range [0.0, 1.0].
If you want a little more efficiency though, you can calculate the blur color Cb only if the near threshold Tn is exceeded. Doing this allows you to skip a bunch of pixel lookups if they're not needed - even a 3x3 Gaussian blur costs nine lookups, which means that coloring each pixel takes nine times longer than just outputting the color without blur (at least).
You can sub in whatever blurring algorithm you want, but we're going with a simple Gaussian blur here. These blurs use what's called a kernel, which is like a table of weights for a bunch of pixels in a grid. Now, in order to get a kernel for our Gaussian blur, we could do all sorts of math, or we could rely on the very kind people who write very kind programs that do this for us. Since I want to keep texture lookups down, I'm using a 3x3 kernel that I pulled from the web.
Gaussian Kernel Calculator: http://www.embege.com/gauss/
That box in the center represents the center pixel - the one that we're actually calculating color for. The boxes around that represent all the pixels around it. What a kernel does is that it tells you how much you should multiply input pixels by to get the value of your output pixel. Here, we take the color of the pixel we're on and multiply it by 0.39894. We take the color of the pixel to the left of it, multiply it by 0.24197, and add it to our output color. You keep doing this for every pixel, adding to the output color every time.
When we're done with this, we actually divide by the total of all weights since this is a Gaussian blur. Just remember that not everything you'll use a kernel for demands that you'll divide by the sum of all weights in your kernel.
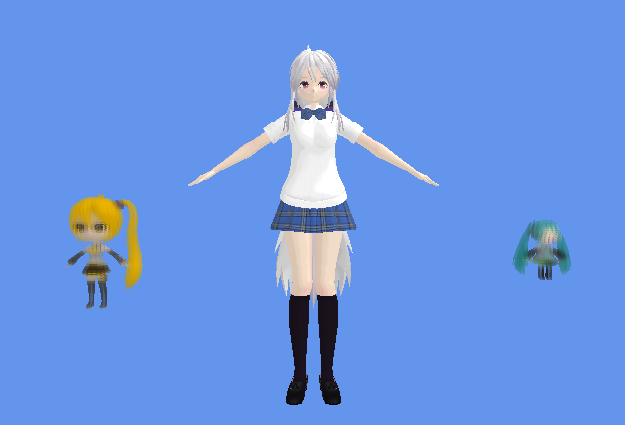
... And here's the scene with the blurring applied. Neru here is partially blurred, and Hachune is blurred completely. Haku, on the other hand, is not blurred at all.
Next Post:
Imitating the Canvas Engine (3): The Canvas Effect - Memories of Melon Pan


